I’ve been slacking a little lately in adding new species to the collection pages, as well as keeping my posting routine consistent – and there’s a good reason for that!
For the last couple months, a massive chunk of my free time has been spent on finally building a 14 foot by 16 foot redwood and polycarbonate greenhouse from a DIY kit I ordered in August of last year. You read that right: order was placed in August and we’re just now finishing it.
This thing was supposed to be a relatively simple kit that we could build ourselves in a short amount of time. I’d heard from a friend that his smaller versions of these greenhouses took less than a day to erect, but as you’ll see, that was far from the case with our kit.
I will not be listing the company’s name, as I do not recommend them in any way and don’t wish to send any traffic their way. If you’re planning to spend the money on a greenhouse, look for just about anyone else. If you would like to check if the company you’re considering is the one I had the below experience with, you can message me directly on Instagram @TrexPlants and I’ll let you know.
Before the Build
I’d ordered the kit in August to ensure I’d get free shipping and to allow plenty of time for the company to catch up on their backlog so I could get it delivered in 2020. With COVID, they had supply chain and production issues (understandable), and my greenhouse kit was not ready until December of that year.
When arranging to receive something like this, be very clear with the logistics company. We’d asked for a forklift, which I called to check on when the delivery was scheduled, and all they sent was a truck with a lift gate and a hand cart, which is laughably inadequate for moving a 1,000 lb pallet on dirt.
However, the delivery driver was very skilled at steering his truck, and the three of us combined managed to shove the pallet somewhere suitably close to where the greenhouse would eventually go.

After this, we had a prolonged period of challenges that included the company refusing to provide updated structural engineering diagrams.
Turns out the company had not updated the build instructions, diagrams, or much of anything about the build since they first created the kits in 1987.
This was exactly as awful as that sounds. As I’d already received my greenhouse kit and paid for it, the company was completely unhelpful and lacking in communication or even the slightest bit of empathy, which made the entire experience dealing with them a nightmare.
After months of dealing with challenges, we finally went ahead and had concrete poured! This was done in June, which turns out was a convenient time to get ahold of the most wonderful gentleman who did our concrete. It is at a slight slope, a fraction of a percent, to encourage good drainage through the channels they set. They also brushed the concrete so it would have a slight texture, making it less slippery when wet.

I went with a concrete foundation, rather than gravel, sand, or dirt, as a measure against pests. I have a very serious problem with rats, gophers, and squirrels, and I wanted my greenhouse on a solid foundation that could not be dug into.
We will need to add more fill dirt to the sides, particularly since we plan on tiling in front and creating a path from the back patio to the greenhouse, but for now it’s solid.
Our chickens were not fans of the concrete truck.

The chickens were, however, extremely fascinated by the whole thing. Above you can see Legolas and Karen closely inspecting the hardware as we checked what was sent.

The concrete was poured mid-week, and we spent the following weekend unpacking all of the boxes on the pallet and moving the lumber up to the greenhouse pad.
In hindsight, we should have moved the lumber to the cardboard tops of the boxes and kept it near the pad, but looking back is always 20/20 vision.
We kept the poly panels in their boxes, as they had plastic protective sheeting attached and exposing that to sunlight would melt things together and make the protecting sheeting impossible to remove.
This was a TON of lumber, and I will say to the credit of the company that made this, every piece that was drilled was done so nearly perfectly.
After unpacking all the lumber, we started trying to assemble the first wall section, and that’s where we quickly discovered how awful the directions were.

The directions indicated that all pieces of wood needed to be connected both with a “scotch fastener” as well as the metal plates and brass bolts that were sent with the kit.
Not sure what a “scotch fastener” is? Neither were we. The things we eventually discovered were the “scotch fasteners” weren’t labeled, and the internet shows scotch fasteners as a fabric/velcro type thing used to hold furniture in place.
EDIT: DAN FOUND THEM.
They’re a vintage piece of construction equipment from a company that stopped making the brand in the 40s or 50s. They were old even when these ridiculous greenhouse plans were newly written.
The name was misspelled/typoed throughout the entire set of directions (it’s skotch, not scotch) and you can still buy them under a different name. They are still not the same as a corrugated nail.

After a lot of googling, staring at the parts, and Dan’s experience with construction as one of his first jobs, we discovered that the box of wavy flat metal things was actually a corrugated nail, also called a corrugated fastener. I still have no idea why the term “scotch fastener” was used – it was typed in with a typewriter over white out on the original term.
In addition to having to figure out what these were for, we quickly discovered something unpleasant: the directions said these needed to be used in all joins for the entire greenhouse. A little bit of math later…that’s 200 of these things.

200 of these, hammered in by hand, on a build that needed precise, close joins of the wood pieces to be structurally sound. We hammered in one and even with me holding the pieces in place, the force needed to hammer it in caused a gap in the wood pieces.
After staring at this for a while and laughing at the absurdity, Dan determined that there had to be a power tool for this, and embraced the opportunity to get one.
I have no idea who on this planet wants to hammer in this many corrugated fasteners by hand, but it’s not us.
Worth noting: the directions say all you need to build this is a hand screw driver and a hammer. This is a lie.

It took us about 8 combined hours to build the first panel due to how poorly the directions were written, but once we figured out the general configuration, things started moving quicker.
Above, you can spot additional tools that we used that were extremely helpful (I’d say necessary) but were not noted as useful in the directions:
- Carpenter’s square (green triangle thing, used to square the beams against the foundation)
- Power drill
- sockets for tightening the brass bolts
- phillips head for screwing in poly panels
- Corrugated fastener gun (in the tool bag)
- Air compressor and line (blue line in the middle; had to get an extension so the compressor could be plugged in by the house)
- Gloves
- Hand socket wrench for tightening bolts
- Measuring tape (essential for making sure pieces were in the right places)

Dan stapling the wood pieces together with the corrugated fasteners. We used none of the ones sent with the kit, as we had to get the type that would fit in the pneumatic gun we got.
You can also spot the other downside to us moving all the lumber up to the concrete pad a little too early…the wood was fairly young, and between the concrete still setting and the wood being young, it left outlines on the concrete. It’s taken about a month, but the lines are fading, thankfully.
These side panels are held together with one join, which is frankly terrifying, at least until you get the benches in. The metal brackets are not enough to keep the whole thing from warping, so a lot of combined effort went into keeping things square and straight.
We also could only work on this for a few hours in the mornings before work and before the sun came up too high – it very quickly got too hot to be out in the sun. We probably should have bought stock in a sunscreen company based on the quantity we went through even in the early morning, June-gloom hours.

Prepping the pieces for assembly the following day. The directions said to “assemble all pieces on a flat surface”, but who on earth has this much flat surface available for days on end to build this?! We could have built this in the driveway, but we need the driveway to, you know, drive to and from the house.
We got creative with layering cardboard and panels, as well as using bricks to keep the pieces off the ground for the day or two they needed to be there while we built the rest of the walls.

The day of assembly, we’d moved all the wood off the concrete pad, and arranged all the panels so we could hopefully install them with minimal fuss.
That was a false hope, but we tried.

Getting these up sucked. We were able to get one corner and from there, began assembling the rest. They’re all attached with 3 1/2″ lag bolts, which you can see Dan tightening using a power drill to ensure a tight, solid seam.
You’ll also notice there’s no doors or center panels – as we were assembling, we’d determined to have one door facing the front of the greenhouse, and one facing the back. We left the centers open because we couldn’t find a panel that would fit for that back right corner…and we’d discover the reason later.

We eventually got the walls up, and while this looks like it’s all assembled and connected, it’s really not. It’s two 3-sided “structures” that are leaning against each other. We checked the forecast and saw that the wind was not expected to be particularly strong for a few days, which made us comfortable leaving this until the next morning so we could continue.
Each day of this construction the day time highs were hitting 90F+, and we both needed to actually go in and work our day jobs as well, so this was a pretty draining period. We’d get up and get set up at 6 am, do as much as we could that didn’t require a power tool until 7 am, and then work until the sun was fully up and burning (usually 9 am) before starting our regular work days, which went until 5 pm.
We could, and occasionally did, do a little more work in the evenings, but I usually cook us dinner, and I needed those cool evening hours to tend to the animals as well as the plants (which were definitely also being neglected during this time).

This was also when we discovered our Supervisors had given their stamp of approval.
Thanks, chimkins.

The next day we started putting up the center portions, and trying to figure out just how the two halves of the greenhouse were supposed to connect.
You see, the directions didn’t actually mention my model, which is 14′ wide by 16′ feet deep. It mentioned different greenhouse depths, noting that the 16′ and 20′ models required wall extensions and how to install those, but nothing about the 14′ wide version.
It wasn’t until we were building this center portion that it fully clicked: there is no 14′ wide version. These are two lean-to halves, not a complete greenhouse.
This was also when we realized that the benches went down the entire middle of the greenhouse, which meant that having a door on each side would mean only one way in to each side. My original plan was that I’d be able to walk in the front on one side and go out the back on the other, but with benches all the way down, that wasn’t an option. We ended up deciding that both doors would be in front.
Above, you can see the pre-drilled frame that we put at the front left of the greenhouse, mirroring the fan-ready frame that was at the back left. We’d done this as the only perceivable difference between this and the other frames for the front and back was whether we were going to put the fan there or not. We placed the fan spot at the back left, as the hill is higher there and it’s not a good spot for a door to go.

We ended up finishing the center beams and roof ridge, but not without more challenges. The directions were, as you should now know, unclear, and at first we thought we had to reposition all of the supports for the center support beams to fit properly.
Nope.
The directions just didn’t specify if you put the beams on the inside or outside of the T-shaped roof ridge, and we had to reference the (again, designed in 1987) structural engineering diagram to figure out how the ridge was supposed to be situated.
We also discovered that the directions specified building the roof as one giant panel on a flat surface that you “carefully lift” into place.
Who has a 16 foot by 7 foot wide flat space that is near where the greenhouse will go AND the ability to lift that entire roof panel up as one piece?! We did not have this, and if you do, I am happy for you and a teensy bit jealous.
We got really frustrated with the roof and decided to save that for another day, instead opting to install the first wall bench to provide some stability as well as a work surface.

We continued to be annoyed with the roof, and opted to build another bench while we tried to figure out the next thorny problem: the rafters needed to be installed with a sort of slanted bracket, but all we were sent were 90 degree brackets. There was no real roof support, and we spent about a week looking for a suitable bracket or trying to figure out just how the 90 degree brackets we were sent were supposed to work because…
No surprise, the directions didn’t specify.
We ended up watching the promotional video for the greenhouse second by second to find how their show models were built, and that was what led us to believe we had the wrong backets. After hunting for a week, we ended up piecing together that for some reason, they’d sent us the 90 degree brackets and expected that to be suitable.
While doing this, we kept working on other portions, like benches. Again, the directions seemed to expect that you’d hammer in all the nails for the benches by hand.
There’s 46 slats in each bench. I have 4 benches. 184 nails, if we only hammer in 1 per bench – but they need 2, one at the top and bottom, and to ensure the slats don’t pull up if they’re bumped at the end, we planned on 2 nails at the bottom and one at top.
That multiples to 552 nails. If we were able to hammer in 1 nail every 30 seconds, that’s over 4 1/2 hours just hammering nails. Assuming you hammer them all in straight, never need a break, and never get tired.
No.
We used Dan’s nail gun and affixed them with finishing nails rather than the larger flat heads that were sent with the kit.

We eventually figured out the rafters, and got those up relatively quickly.
We then put up the bracing beams, as well as an initial roof panel.
It took considerably longer to figure out the roof as opposed to the walls, because out of the 14 pages of directions, 10 of them were dedicated to the walls. 1 page, with 12 small-print (whited-out/corrected) steps, was dedicated to the roof.
We’d also finally connected the two sides at this point; they were pretty much held together by a few 3 inch bolts through those center beams. This also took longer than you might have thought because no where in the directions did it mention how you attached the two sides together. We ended up going through the hardware sent and staring at the supports, and making an educated guess as to why we had all the extra long bolts.
We also discovered by this point that they didn’t send enough washers, and they did not send any spare 3″ bolts for bolting the rafters to the center ridge. Excellent.
One of the bolts ended up stripped and needed to be swapped, so we used one of the 3 1/2″ bolts (of which they sent a ton extra?) for the rafter portion…which meant for a proper fit, we had to get drastic.

Dan had to grind off the excess bolt portion to ensure the rafters fit properly.
You can see on the other side that we’d been checking the roof installation fit; we ended up not continuing the roof for a few more days so we could confirm all the parts.
I was getting extremely antsy about finishing the roof at this point, as the local mockingbirds, blue jays, and of course, our chickens, were routinely coming in and pooping inside. The mockingbirds in particular eat a type of black berry that makes their poops super dark and deeply staining, so keeping them from crapping all over my pretty benches was paramount.

While waiting to get more parts (I believe at this point, it was appropriate length sealing screws so the roof would be water tight), we built more benches.
While the directions made no mention of this, because again, we basically were bolting together two halves of a lean to, we ended up choosing to have the center benches touching. This meant that Dan cut the excess lengths off of any boards that butted up against the center support beams.
That meant using a table saw in addition to the nail gun we’d been using to attach them so far.
“All you need is a screwdriver and hammer!” my ass.

It took a couple more days, but we eventually got the roof on and attached. We had to use a screwdriver and hammer to help guide the panels into the H-channels that were sent to connect each piece, which was…not the easiest.
In the photo above, you can see a side panel poly piece sitting sideways on the center benches inside.
That’s because by this time, we’d pulled out and checked every single piece of poly siding and roofing.
That back right corner didn’t have a center poly piece that had the UVB coated side facing the right way. The side panel could fit in the front left side, but that would mean I’d have no door on that side. How on earth was this supposed to work?
It turns out, after a morning spent staring at the directions and what we were sent, is that there was only one configuration this should have been built in: the fan needed to be on the *right* rear side of the greenhouse, or else you’d end up as we did, with improperly fitting/cut poly side panels.
Was this in the directions?
Noooooooo, why would that be noted anywhere?

Once the roof was up, it was time to sand and seal the benches. We originally weren’t going to, but after seeing how pretty the wood was, we changed our minds.
Sanding also took care of the splinters on the tops and ends, as well as the pesky remnants of poo stains.

I began staining the next day, and you can see the color change above. We went with a nearly clear coat stain to bring out the natural color of the wood, and applied two coats.
I think my only minor complaint is that it didn’t keep the pale pink that some boards had; they all deepened to a rich red-brown.
We also discovered that the wood was very young, which meant the stain took twice as long to dry and not have a tacky feel. You also are not supposed to stain all surfaces of redwood! It needs to breathe so it can continue to dry – so we didn’t stain the bottoms, just one side. If you do stain all sides of a redwood board, the trapped moisture will end up rotting the board from the inside out.

Once the benches were stained and dry, I installed shade cloth throughout. I used hooks and punched brass grommets into the shade cloth to help keep them looking nice for a longer time period.
I wanted the shade cloth to go up in a way that I could easily control, taking it down or putting it up seasonally as needed. It’s on the inside of the greenhouse to help preserve it and keep it looking nice long term.
We have not installed a fan yet; because there’s no power out this far back on the property, we’re setting up a solar powered system rather than using the fan that came with the kit. Without the air movement, the greenhouse gets scorchingly hot – 125F if I keep both doors closed.


Once the shade cloth was up, I began moving things in!
The doors are dutch doors, so after an initial 125F day with plants inside, I’ve been tying the top half of the doors open so my plants don’t melt.
We’re using the wooden stakes that the kit came with (apparently, these are supposed to be what anchors the greenhouse to the ground?!) to hold the bootom of the doors closed – it came with wooden turn latches, but I’d rather use a hook and eyelet latch to hold the doors open or closed.

Filling up!
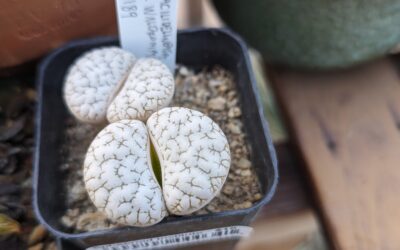
This has been a slow process, as for each and every plant going in, I’m doing the following:
- If it’s been over a year since last potted, repotting the cactus
- Watering thoroughly and fertilizing
- Checking for pests
- Spraying with a long-lasting, residual pesticide (also used as a perimeter spray to keep ants out)
By the time the residual pesticide wears off, it’ll be cooler months, and I can introduce some beneficial insect predators to the greenhouse as a final sweep. I’ll have a fly bag and yellow tape up to catch flying pests like flies, but my biggest enemy and preventative actions will be to keep ants out. Ants love to carry mealybugs and aphids to everything, and have been a major challenge for me to keep things blooming happily and pest-free.
While the greenhouse is close to completion, we still have a few more things to do:
- Install the fan, solar panel, and battery
- Install the concrete anchors
- Screw the edges of all roof panels down with self-sealing screws
- Add fill dirt to the lower sides
- Tile the front
- Make a custom door for the back right, with a vent
- Move my potting bench to the back door
- Put up a shade awning along the back
- Move the Etsy shop inventory to the back
I’m still mulling over whether I’ll move my shop inventory into the greenhouse or not, as doing so would risk breaking the cleanliness level I’m striving for to keep pests out. It is an unfortunate fact of life that bringing new plants home from the nursery is always a risk for introducing pests to your collection. While I spray and monitor my shop inventory, the soil can always hide eggs (that’s why I ship bare root!), and at the size my collection is reaching, I’m increasingly hesitant about introducing new plants without quarantining first.
As it fills up and I can scrutinize everything more closely and constantly, I should be able to publish consistent care diaries and information again soon.
For more photos and details about the build, check out the highlighted stories on my instagram! @TrexPlants