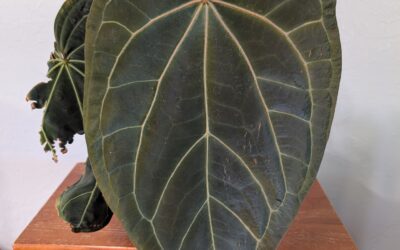
As the pandemic was just winding up and the insane plant craze was beginning, I snagged myself a nice big pot of Monstera siltepecana. I’d tried a couple times before with smaller, single-node cuttings that weren’t well rooted, and had had them slowly decline on me both times.
Not this pot! This thing was big, lush, and had numerous well-rooted cuttings in the pot as well as a couple smaller stragglers. I think it originally came from some nursery in Florida, maybe even a Lowe’s, but a lovely lady in one of the plant Facebook groups I had joined offered it to me at a great price.
At right is the siltepecana when I first stuck it outside. I’d originally recieved it sometime in summer, I think July, and this photo is from early September of 2020.
I left it alone, no repotting (it arrived in a pot with original soil, which is technically a no-no) and kept it isolated from other plants for about a month. It didn’t really grow much, but also didn’t do any worse, so after that month I repotted it in entirely fresh soil and a new 8″ pot with a grow pole.
With the new soil and slightly larger pot, it did start growing some nice new foliage, but it wasn’t really climbing the pole or otherwise doing much. So…with my Thai constellation doing so well outdoors, out went the siltepecana.

Soil and Care
My first soil mix was simply rinsing off the roots and repotting in a soil mix that was 75% Happy Frog and 25% orchid bark. With how slowly these grow, I knew it would need to be something suitable for a while, and I didn’t want to disturb the roots again if I didn’t have to.
At this point, I’d used the Happy Frog soil pretty regularly and found it to be a fantastic, rich soil perfect for my houseplants. The only downside to it is that it’s fairly dense and doesn’t drain well, especially not after being in use for a couple months.
I found that using houseplant soil on its own often compacted within a matter of weeks or months, which led to poor drainage, poor water absorption, and perpetually thirsty looking plants even if the very top of the soil looked damp (or the bottom drainage hole was still damp if I lifted the pot to check).
My initial soil + bark mix worked well for the Monstera siltepecana; combined with the repotting and being placed outdoors next to the Monstera deliciosas, it thrived! Plenty of new leaves and after a while, I even began to see aerial roots latching to the grow pole.

A smattering of new leaves in October 2020

November 2020 – exploding with leaves
Lighting
The exposure to natural sunlight, particularly just a couple hours of mild morning sun and then full shade the rest of the day, made a huge difference in the growth for the Silte.
I tried bringing it indoors over the winter as night time temperatures dropped, and it did…okay. I had a grow light on it and kept it next to my humidifier and it kept producing a couple of new leaves at a time. I even experienced my first baby fenestrated leaf while it was indoors!
If we’re talking foot candles and light exposure, this plant has done phenomenally with a couple hours of 500 – 600 foot candles (morning light before 11 am, direct sun outdoors) and a slow dip to between 300 and 400 foot candles the rest of the day (full shade). Not sure how to measure this? You’ll need a light meter; it’s a complete game changer for your growing .
Indoors, the grow lights were a consistent 300 foot candles all day, but lasted about 14 hours. By comparison, outdoors, light was usually only at a peak for about 6 to 8 hours, as it was fall and heading into winter when I put it outdoors.
Indoor lighting would turn on at 7 am, and off at 9 pm. Outdoors, light would reach 300 foot candles by about 9 am, increase to a peak (600 FC) at 10 am, then drift steadily down from 400 foot candles to darkness starting at 2 pm to sundown.
The distinction between the lower foot candles, but longer exposure, compared to the outdoor exposure with a short stint of higher light exposure, is important for you at home to determine where your siltepecana will grow best. These definitely seem to need more light to thrive, so consider them a “high light” plant similar to Monstera deliciosa when growing indoors. A set of quality grow lights, preferably multiple to cover a large area, will be your best bet.

March 2021 – Moved to our front ‘courtyard’ area, brighter light all day but less direct sun
Watering your Monstera siltepecana
I had the best success with my Siltepecana when I mildly neglected it on par with how I treat my Monstera deliciosas.
I let it get quite dry before watering again, usually to a point where I could distinctly feel that the pot was light when I picked it up. The white plastic pot I used for the first year had too small of a drainage hole, so water didn’t readily pour out and through the soil. To compensate for the less than excellent drainage, letting it dry out a bit more between waterings definitely had a nice impact.
On hot San Diego summer days, this often meant every day or two. In winter, it was more like every two or three weeks. The colder the nights, the more I tried to let it stay dry (weather permitting).
Fertilizing
Once the weather warmed up, I started fertilizing semi-regularly. In winter, with the cold temps, I didn’t want to give it too much food or encourage too much growth with the potential for frost at night. Next to the adobe bricks, it was highly unlikely it’d actually experience frost, but in slower winter growth it didn’t need much supplementation anyway. With a relatively recent repot, it also hadn’t needed fertilizer prior to this, as the soil likely still had plenty of nutrition.
Starting in early spring of 2021, I began fertilizing roughly every other time I watered using Dyna-Gro Foliage Pro+. I wasn’t strict about it; if I remembered to fertilize, I did, and if I didn’t, no big deal. The end result was the siltepecana was fed every two to three weeks.
I also used dilute fish emulsion on occasion, but the smell and the way it would linger at the bottom of the pot (tiny drainage hole) made it less than ideal.

You can see one of the aerial roots growing into/grabbing on to the grow pole. I got the best, biggest leaves when it had grow pole material to grab onto.

I got a single sport variegated leaf last year! It was a tiny splash and hasn’t shown up in other leaves since, but a neat find nonetheless.
Monstera siltepecanas need to climb!
While you can grow these as a trailing or hanging plant for a while, you’ll get the best looking leaves and growth if you provide it with a grow pole. Something with texture that can also hold a bit of moisture is ideal in my experience, but even just tying it to a pole works well enough.
When given adequate room to climb, adequate light, and not moved around, these grow in a semi-shingling pattern, with one side of the leaves being smaller than the others so they curve slightly.
In July of 2021, I repotted my siltepecana into a 3 gallon pot with an old trellis we’d originally used for green beans. Soil in the new pot was 50% happy frog, 25% bark, and 25% pumice this time – better drainage, and some inorganic material added to help minimize soil compaction.
I tied as few of the vines to the trellis as possible to minimize the vines getting constricted or growing weirdly around the ties.
I kept it out front, next to my Philodendron Red Emerald and Philodendron stenolobum (er, Thaumatophyllum). It had been growing well in that spot for months, so a pot and climbing upgrade would likely go over quite well.
I had to use an adobe brick to help weigh down the pot, as the trellis made it super top-heavy.


The growth that’s highest up is beginning to fenestration consistently.

After 6 months of growth – January 2022!
6 months in the larger pot with the trellis to climb has been phenomenal for the siltepecana! It’s been left exposed to the elements entirely – nights with air temps down to 32F, and our unusual series of cold rainstorms. After we had nearly 8 days straight of rain in mid-December, I have yet to water it again. Cold nighttime temps and highly saturated soil have definitely needed time to dry out.
Despite being soggy from rain and then cold, the plant hasn’t really seemed to suffer, it’s just slowed down in producing new growth.
Propagating Monstera siltepecana
Ugh, the worst, if you ask me. I last tried propagating cuttings back in early 2021, and I’ve improved in technique since then, but these are slowwwwwwww to go.
I’ve had, frankly, abysmal luck with rooting these cuttings, so I’ll share with you the ways I’ve tried that *haven’t* worked so you can learn from my mistakes.
- Straight into soil (houseplant soil)
- Straight into soil (succulent soil)
- Sphagnum moss (kept super wet)
- Sphagnum moss (kept on the dry side)
- In water
I think in all of these, my isssue was poor lighting (I didn’t have cuttings under grow lights or right next to a bright window), and it was the wrong time of year and too cold.
I’ll try again in late spring, when our average house temperature is in the mid 70s or warmer on average. I also plan to try in perlite and sphagnum moss (again), but keep things more consistently moist. I have a glass grow case now, with LED grow lights throughout, so starting cuttings is much easier now than it was before.
Even rooted cuttings I’ve received from other people were slow to take off and eventually rotted, as did the semi-rooted baby plants from my original pot that I sold or gave to others. If you do try to start these from cuttings, be sure to try in a warm season and be prepared to experiment.