It’s one thing to bring a cactus home from the nursery or hardware store, and another to actually get it out of the pot and into a new one.
For the absolute novice, figuring out how the navigate the spines can be daunting, as well as figuring out what “good” soil should look like, how to mix it, or how to position their new plant in the pot or soil.
If you’re starting from the very beginning, this is your guide to repotting your beloved cacti!
Affiliate Links
I’ve recently added affiliate links to this and other blog posts to help pay for increasing server costs. If you’d like to buy the supplies I recommend, please consider using my links to shop and help support the site!

Our Goal: A Nicely Potted Matucana madisoniorum
Before we get to my adorable little matucana, we’ll need to gather a few supplies first. You’ll need:
- Super thick, sturdy gloves – preferably thick leather. You can also double up on gloves as further protection; I like using a thinner weeding glove before putting on the leather if I am particularly nervous about spines
- A bonsai rake or similar small tool – you’ll be using this to clean off roots. Bonsai rakes were custom designed for this type of small-scale maneuvering! Make sure you get one that is one solid piece, rather than the miniature gardening tool type sets – the tool heads always come off.
- A mesh drain hole cover – This keeps the soil from washing out but still ensures good drainage
- Your pot – Cacti will always need drainage. Always. Make sure your pot has at least one decent drainage hole, and is only a bit bigger than the current pot.
- Perlite or Pumice – Perlite is lighter and helps with drainage, pumice lasts longer and doesn’t float up as much
- Quality succulent/cactus soil – Try not to use miracle grow if you can; it’s too uniform and tends to hold onto water for too long. I prefer to buy EB Stone or similar from a local nursery, but this blend on Amazon looks okay.
- Top dressing – this can be more perlite, it could be river pebbles, it could be staging rocks, gravel, akadama or any number of inorganic material.
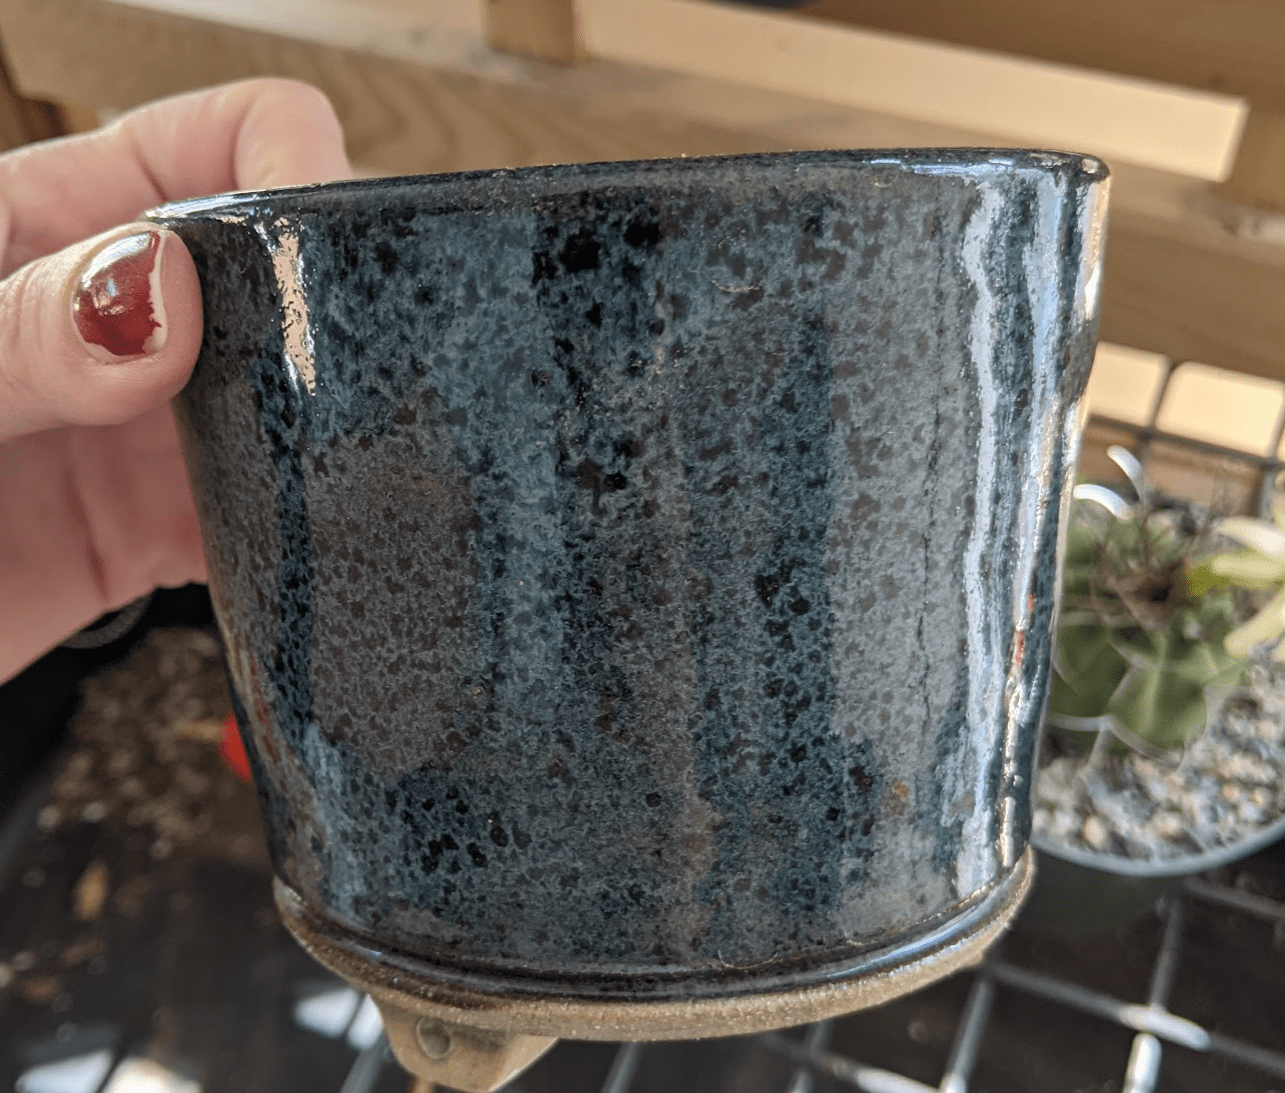
This will be the pot I use for the cactus – it’s not too big, not too small. It is almost exactly the same size as the 5″ pot the Matucana is currently in, which is about what I want. This particular species doesn’t get very large, but does appreciate soil being refreshed, so this size is suitable long term.

See that nice big drainage hole? It’s big enough that if I were to pour soil and pumice right in, the mix would promptly start to fall out. This is good for draining water, not so great for keeping soil in the pot.
The mesh you use to cover the drainage hole doesn’t need to be particularly fancy. Many folks use hardware cloth, in this case, since I expect to repot this cactus again in a year, I’m using some nylon netting from a little jewelry pouch I was using to catch seeds. It’s synthetic, so it probaby won’t break down, but I’m not holding out hope for it to last for long periods. If you do want to leave it for years, you’ll want to use a sturdier mesh.
If there’s multiple drainage holes, you can affix the mesh with a bit of wire, but for this pot it’s a bit overkill.
[Edit 04/2024: I’ve since repotted the cactus again, as this mesh didn’t hold up well at all. The molded plastic ones are way nicer and stand up way better.]

Mixing Up Your Soil
There are as many ways to mix soil as there are people with opinions about it. At the end of the day, the best way is what works for you and keeps your cacti growing happily. Depending on where I picked up the cactus I am repotting, I’ll also check what the nursery or original grower was using and how happy the cactus seemed to be in it. More and more, I’m seeing the happiest cacti from my favorite growers thriving in mixes that are at least half inorganic medium.
Inorganic Medium: a component of soil that doesn’t break down or decompose, such as perlite, vermiculite, pumice, lava rock, or similar materials.
The pumice that is readily available to me is usually varying sizes of stones, ranging from small sandy grit to bigger pebbles, and makes for a chunky, airy mix that is still relatively uniform. Pumice is a type of volcanic rock, and works well for longer-lasting plantings, especially if you expect the plant to stay in a given pot for years. It won’t really break down, it doesn’t float away, and it looks a bit more natural.
Perlite is a white, super-light material that is made from volcanic glass with the same name. Our horticultural perlite is created when the volcanic mineral is super-heated and water gets into it, causing it to expand 7 – 16 times its original volume. The stuff we use is bright white due to how reflective the bubbles in it are! I only use it in a mix if I’m expecting to repot the plant within 6 – 12 months; I find it annoying how the little bits tend to float up to the top of the soil and blow away into the yard.
For this cactus, I’m using pumice because I like it, and may not repot this for up to 2 years after this. The chunks are bigger than perlite, and the cactus roots seem to appreciate having varying sizes of soil composition to climb through.
Soil selection: I mix additional pumice into my soil pretty much every time for my cacti, as most soil mixes have too more organic medium. I use the EB Stone cactus and succulent soil as that’s readily available to me, and I like the composition of varying materials. They break down at different rates and seem to allow for moisture to evaporate or drain quickly. Compared to MiracleGro or a similar mix that is almost entirely uniform in texture, and has large quantities of peat moss or coconut coir in it, this will get “swampy” at the bottom less often, and will hold onto water for a shorter period of time.

Cup o’ pumice ready for mixin’

My current favorite cactus soil at the moment. I’m not looking for golden dirt, I want something fast draining, chunky, and easy.
If you’re better prepared than me, you’ll have a container ready to go to mix the soil in, which is far, far easier to deal with than using red solo cups. Before you move on to prepping your cactus, get your soil all nice and mixed up, and fill your pot just under halfway with the soil.
[2024 edit: a game changer for me was getting a concrete mixing tub from Home Depot for less than $20. (not an affiliate link) You can use a kitty litter box or something from Amazon, but the concrete tub is a big heavy duty dirt recepticle that’s been absolutely amazing for mixing up soil and potting plants.]

Taking a peek at my half-filled pot, you can see that even with a very roughly 50/50 mix, there’s plenty of cactus soil visible. I like to get as much of my pot and soil prep done ahead of time before I put my gloves on, because fine motor control is something of a challenge with dual layers of gloves.
Preparing your cactus for planting
At this point, glove up, and scope out your cactus.
Is it like my matucana, and there’s some less-spiny parts closer to the base of the plant? Is there no spot at all that is safe to touch? Are the spines big and long, short and sharp, or are they the super annoying sticky fiberglass-like glochids?
Fiberglass-like glochids are both easier/harder to deal with – if you’re willing to just grab em with your gloves on, the double-layer usually is too much for them to get through. They will absolutely stick all over the gloves though, so be prepared for those gloves to be useless for anything besides grabbing cacti.
Widely spaced spines are much easier to mess with, and the double layered gloves act as more of a cushion between your tender little fingertips and the stabbing pain of cactus spines. You’ll see me gingerly positioning the matucana with careful finger placement in later images.
The short, dense, but not-quite-glochid type spines that completely cover cacti such as echinopsis, certain parodia, or smaller notocacus are honestly kind of the worst. Doubling up on gloves helps a ton, but they often have longer “guard” spines, or the spines are just barely long enough to poke through. You can use kitchen tongs, tweezers, or even cardboard to help put a barrier between your fingers and the spines. Using the tools will likely break quite a few spines, so a) get the cactus in a pot that you won’t need to repot again for a while and b) if you expect to have this cactus as a show cactus, plan for at least a few months if not a year of growth to hide the damage.

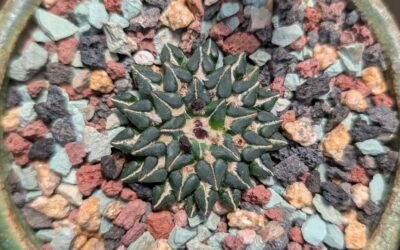
Matucana madisoniorum in its original pot and glory. The tag for this says “pink flower”, but something tells me this particular cactus will not produce pink flowers.
It has a layer of stones as top dressing, which hasn’t deterred weeds from taking root. This particular cactus has nearly doubled in size since I first brought it home last spring, so I wanted to stage it for the San Diego Cactus and Succulent Society brag table.

Make your life easier. Pour out all that top dressing before you try to pull the cactus out. Grab the base of the pot, and if it’s a plastic pot like this one, you can squeeze a bit. You should be able to squeeze the root base somewhat, so the cactus won’t tip out but all the loose material on top will just fall out.

If you’re lucky, the cactus will slide out when you stop squeezing the sides of the plastic pot, but if not, squeezing around the entire pot a few times should help dislodge it.
For plants in terra cotta or solid materials, a little gentle shaking should tell you if the cactus will easily dislodge. If not, run the handle of your metal bonsai rake around the outside to detach the roots from the sides of the pot.
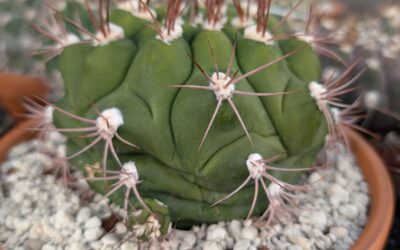
Good signs are that the roots are grown in enough that the soil doesn’t really budge once the plant has slid out of the pot – that means it was grown in enough to be grabbing on tightly to the soil.
In the cactus pictured above, I’m repotting a bit early, because it’s not very root bound looking. “Root bound” looks like much of the bottom 1/2 of the pot is made up entirely of roots, due to the pot constricting growth. Part of why this cactus slid out of the pot as easily as it did is because it wasn’t quite root bound enough.
You can see roots beginning to grow out and around the edges of the pot, but they’re not wrapping around like a pile of rope.
No matter. It needed a prettier home.
The next step is using the rake side of your bonsai rake to gently, but firmly, start raking out the roots so the soil and pumice come off. You don’t necessarily need the roots to be pristine, and for many species with more delicate root balls, knocking off too much soil can damage their little baby roots. What you’re looking to do is dislodge the larger pieces of old soil and pumice so there’s room for the new stuff.
In a truly perfect repotting scenario, you’d rinse all soil off and dispose of it far away from your actual collection to ensure no bugs or related pests are left behind, but…unless you have an active mealybug or other pest problem, that’s overkill most of the time. Knock as much of the dirt and pumice off as you can, and call it good.

Oh yeah. Look at those roots.
There’s still dirt attached, but for this case, it’s fine. You can see a nice solid root base at the bottom of the plant, and lots of small, capilliary-like roots that branch off from the main roots. You can see tiny bits of perlite in the soil still stuck to the roots; it’s like glitter, you can’t get rid of it.
Your next step is sticking the cleaned off plant and roots into your half-filled pot of dirt.

I have my little bonsai rake in there because I use the flat handle portion to gently wiggle the roots into the soil. I want to ensure that the soil mix fills all the new gaps there are between the roots – if I don’t do this, the plant will take longer to settle in, or the air pockets may trap stagnant air or water and lead to rot.
Prevent rot, wiggle roots!
At this point, take your time and slowly pour in more soil around the roots. Use your tool of choice to gently wiggle the roots and soil into place with each layer of soil you add in. You can also lightly tap the pot on your work surface to settle the soil in place; if your cactus wiggles drastically when you do this, you’re not incorporating the roots into the soil well enough.
Take your time and go in small layers. This makes it much easier to work the roots in, and takes less effort to do so. I generally will go with a thin layer, gently wiggle with my tool, tap the pot a couple times, and then add another thin layer.
Notice that I’m cautiously holding the cactus at strategic points for this – you’ll need to be equally as creative with other types of spined cacti. For those that are particularly challenging to use your fingers for, a couple thicker layers of soil after the initial placement can help keep it in place with minimal touching.

Once you have the soil nearly to the top of the pot, as above, use a finger to carefully pack down the soil a bit. At this point, you’re ensure the cactus is firmly placed, and making room for your top dressing.
Top dressing can either be for purely functional purposes (to minimize water evaporation or to increase humidity), or to make things beautiful, or both.
A top dressing of pumice is one of my preferred “workhorse” type of top dressings, as it makes it easy to spot weeds, it’s lightweight, and it won’t retain heat or reflect it onto the plants causing burning. I use it to help retain moisture, particularly in summer, as pots without top dressing can often dry out entirely in a matter of hours at the height of summer. In winter, it dries quickly and is fast draining, and seems to hold moisture without making soil overly soggy as bark or river rock can sometimes do.
You can use a small trowel or similar tool to carefully pour the top dressing over your soil, or just haphazardly pour, it’s your call. I usually add enough to not be able to see the soil underneath, which is about 1/4″ – 1/2″.
A tip I learned from SDCSS meetings is for cacti or succulents that require high levels of calcium or acidity, you can add a chunk of limestone to the top of the soil or at the base of the plant. A limestone chunk will slowly leech calcium without overwhelming your plant, and done right, it can also be a great staging piece for visual impact.
Most cacti readily available and suitable for novices don’t need this type of supplement, but it’s a fantastic idea to keep in the back of your mind as you expand your collection.
")
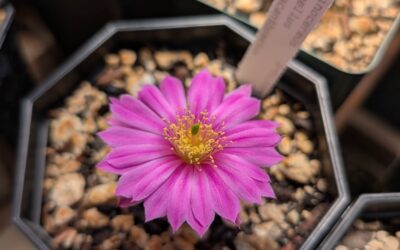
Matucana madisoniorum var horridispina
And there it is! By the time I took the final photo and had staged the top dressing, the flower had finished blooming and fallen off. Repotting your cacti while they are blooming can lead to the cactus finishing its blooms early, but for this cactus, there were no others getting ready to bloom remotely close to when this flower was open. As there was no way to pollinate the bloom, and it wouldn’t be open by the time I took photos to submit to the club, I felt it was worth potentially interrupting the bloom season for a repotting.
Hopefully, if you’re new to keeping cacti and have been unsure about how to go about repotting your spiny friends, this has helped you.
You are always welcome to share your cactus questions with me through Instagram @trexplants!