Growing Lithops in Cultivation
Poor, poor lithops. An extremely popular plant, in large part because it looks like you are growing a pot of butts, but one that is often poorly cared for and dies a slow, sad death at the hands of beginner succulent keepers worldwide.
Lithops are members of the Aizoaceae family, although depending on who you ask, they’re split into their own family, the Mesembryanthemaceae. Since no one can remember or even pronounce that, they’re commonly called “mesembs”, and that includes the pleiospilos, conophytums, and similar types of living-stone-shaped succulents.
The internet likes to say these make ideal houseplants, but the internet lies. I’ll provide a few books as well as a reference site that is more reputable than your aunt’s friend’s nephew on Facebook, as well as a care guide below that covers how I have cared for mine over the years.
An important caveat: I live in North San Diego County, on the inland side, and that influences my overall sunlight, temperatures, humidity, rainfall, and other conditions that are likely quite different from your own. Take my recommendations and adapt for your conditions!
Original Ecology
Lithops occur primarily in the southern range of Africa, mostly along the western coast bordering on the Atlantic ocean, and then inland on the eastern coast. The region is also called the Karoo region, namely the Nama Karoo and succulent karoo regions. They tend to grow in gravel-rich flats and hills, with soils based in granite, quartz, shale, limestone, or schist. Schist is metamorphic rock formed from mudstone or shale, and typically shatters into thin, irregular flakes – a quality it shares with the other rock types lithops grow in.
When growing in habitat, lithops are so close to the ground, and so closely resemble their neighboring rock habitat, that they are nearly impossible to see unless they are flowering.
Soil and Roots
When growing lithops in cultivation, it’s important to consider their typical natural environment. They commonly grow in flaky, irregular rocky soil, and similar porous soil conditions should be provided in cultivation. Compared to the soil you commonly buy these potted in, that can seem almost insane – I commonly pick up two or three year old seedlings growing in a peat moss or coconut coir mix, which is absolutely not suitable for long term health or growth of a lithops. The soil your lithops is planted in at the garden center, nursery, or whatever shop you bought it at is likely entirely unsuitable and should be replaced ASAP.
Healthy lithops tend to have snaky tap roots with small root systems that are adapted to growing and squeezing water and nutrition from extremely rocky soil that is nearly, but not entirely, devoid of organic material. Compare this to the rich soils that seedlings have been germinated and grown in at a typical nursery, and the stark difference in long-lived lithops vs your home plants that survive a year or two at most starts to be something understandable. Many times, recently unpotted plants grown in large scale nursery conditions with have little to no root systems at all. This is due largely to the rich soil and regular watering routine they are often in during early life at the large nursery.
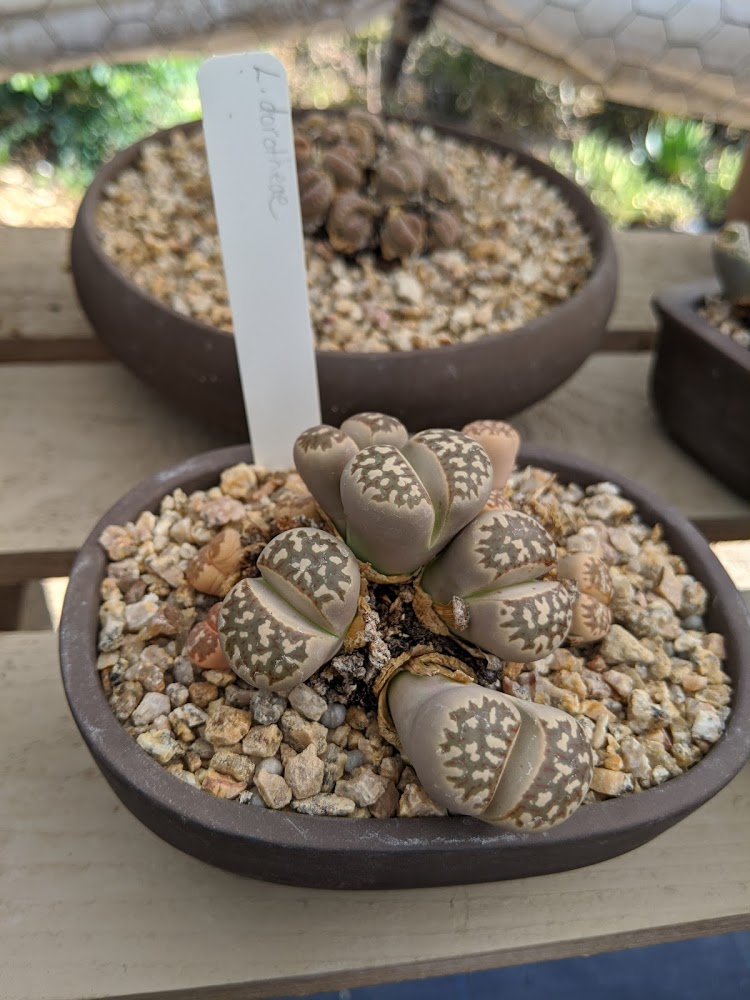
If you want to grow your lithops for the long term, you’ll want to pot it in a rocky, mineral-rich soil blend that has excellent drainage, dries quickly, and has only a small amount of organic material. When repotting a nursery grown plant, it is extremely likely it’ll look very sad when you first do this. Common normal reactions are to retract close to the soil, wrinkling, and otherwise looking pathetic and making you worry. Check out the lesliei hybrid below, with the typical wrinkling you see when first repotting a lithops into a more genus-appropriate soil blend:
That wrinkled appearance is normal and healthy; it’s the plant adapting to the less rich soil that is more appropriate for growing it over the long term.
If you’re really diligent, you can hunt for appropriate quartz, shale, or similar thin flaky rocks to use in your soil blend, but that’s generally overkill. A blend of roughly 50% pumice, 25% sand, and 25% succulent soil mix (NOT miracle grow – pay a little extra for a dedicated blend that’s not quite so rich in organic material*) works just fine, and is what I have used for my mesembs for several years now.
If you are particularly worried, you can make your blend more like 50% pumice, and 50% succulent mix (particularly since that often has pumice and inorganic materials mixed in anyway), but try to ensure the soil is distinctly gravely or rocky for best results.
Sunshine, Temperature, and the Impact on Watering Routine
In the wild, lithops grow partially buried in soil, often on hills or protected from too much direct sun during the hottest part of the day. This commonly means several hours of direct morning sunlight, and lightly filtered or shaded light for the afternoon.
Their watering needs are commonly one of the most confusing aspects of their care, but when you consider the plant and its needs, rather than the condition of the soil, it gets a little easier to follow. Their growing season is during the Northern Hemisphere’s winter, but they do not necessarily need significant amounts of water during their growing season. Instead, you should be watering based on their growth cycle.
Following a calendar year in the Northern Hemisphere, they are dormant for the hottest and most intensely sunny parts of summer, and should be watered sparingly or close to not at all. In humid climates, and for plants grown outdoors, chances are you won’t need any water at all as long as the plant is protected from summer storms. For my region, with extremely dry and hot summers, I gave my lithops water a handful of times when they were extremely wrinkled and pruny, mostly just to give them a chance to plump back up and not shrivel away to nothing. From experience, with temperatures consistently above 90F and no rain, if you don’t water your lithops when you see them shriveling, they’ll just shrivel away to nothing.
In early fall, typically around September, the autumn bloomers start throwing their flowers out. My karasmontana “red top” lithops keep throwing blooms this time of year, including into October and even in November. Some lithops varieties bloom in spring instead, with your common nursery grown hybrids being fairly predictable spring bloomers.

During this time period, the plant is actively growing, and regular watering when the soil dries completely is needed. Even if the plants are firm and robust, if the soil is dry, it’s time to give them more water… as long as they don’t get below 50F at night. The cooler it is at night, the less they should be watered, which makes for a challenging cultivation regime indoors. Here in San Diego, it stays in the 80s and even 90s well into November and even December, so our lithops will bloom all the way into early winter and can be watered during this time as long as it is a controlled setting. Rainfall is often too cold of a day with too little sunlight for it to be a good way for lithops to be watered, so ironically, even if it’s raining during their growing season, you should protect your lithops from actually being rained on for better control of their soil moisture.
As winter approaches and the plant finishes blooming, it’ll start to widen between the two plant bodies. This is usually the new leaf bodies growing from the old ones, and once the flowers have dried, you should stop watering entirely. This is the time period where no matter how dry and shriveled the plant looks, the soil should stay entirely dry and the lithops should be protected from temperatures below 40F. I have had specimens survive and even do fine with winter temperatures down to 32F for an hour or so during the coldest part of the morning, but that was only with dry soil and protection from any actual frost on the plants.
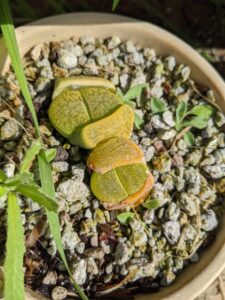
Below is my lesliei in active division and leaf absorption; this year, it didn’t increase in the number of leaf bodies, but it can take 3 to 5 years for plants to begin to cluster. You’ll notice my lesliei has weeds growing in the soil and that the outer leaf bodies aren’t fully shriveled or absorbed – this particular plant got just enough of a winter sprinkling before being protected that seeds blown around the property were able to establish, and the old leaf bodies didn’t quite have to give up all their moisture quickly for the new leaf bodies to develop.
The lesliei pictured above were splitting that way in February of 2020, outdoors with no protection with nighttime drops consistently in the low 30s, so in my particular area and my conditions, they can tolerate quite cold nights. Most of the time, though, you’ll want to protect your plants more.
As spring begins to warm up, the lithops growth cycle ends its loop. As the old leaf bodies are fully absorbed, you can and should lightly water your lithops to give them moisture and energy in preparation for a long, dry summer. You should thoroughly water your lithops at least a handful of times during the spring, as long as the soil is able to dry between waterings. As the soil dries out, water again, up until the weather starts to consistently be hot, and the plant is no longer actively growing. It can be hard to tell, but my general rule of thumb is around June or July, I consider summer to be in swing, and I only lightly water my lithops until fall awakens them again.
It’s important to note that a general routine of “water once a month” or anything at all along those lines is entirely wrong. If indoors, your lithops should be by a window that gets multiple hours of nearly direct sun in the morning, and some filtered light in the afternoon, and this recommendation is all the more appropriate if keeping your lithops outdoors. Watering regimes are entirely dependent on the lithops’ growing season, state of dormancy or growth, and your local seasons.
Common Mistakes That Will Slowly Kill Your Lithops
#1: The above mentioned “water once a month/week/year” type of routine-focused watering. Lithops don’t grow on a consistent basis, and should not be watered as such. If your lithops was doing well for a while, then suddenly seemed to turn to mush, it’s probably that you watered while it was dormant or otherwise not in a growth state that even needed water. Learn the plant’s growth cycle, and water based on that. Yes, it’s harder at first to do it this way, but it’s where you’ll see the most success. And in a lot of ways, it’s actually easier – you’re only actively watering and paying attention to these plants for 3 or 4 months out of the year.
#2: Putting your lithops in a terrarium or fairy garden. Lithops need good ventilation, dry conditions, and again, plenty of light. Your average little terrarium with sand for soil is going to be a strange combination of stagnant, vaguely humid air, and terrible soil for the lithops (or anything else) to actually grow, much less thrive. You could successfully grow your lithops in a terrarium if it was well ventilated with a fan, or was just a wire frame, or was actually a large ventilated greenhouse, but those cute pinterest fairy garden terrariums will kill your lithops, end of story. There’s a reason you don’t see anyone with them for longer than a year. Anyone who has grown their lithops in a terrarium for multiple years is probably actually a fairy or witch, and you should introduce them to me because I’ve always wanted to be friends with one.
#3: Keeping your lithops anywhere indoors that isn’t receiving almost direct light for at least a couple hours in the morning. These are desert plants that adapted to intense heat, sunlight, and little water. You can’t keep them on your dining room table 6 feet from the nearest window and expect them to thrive.
#4: Fertilizer of just about any kind. These plants literally grow in almost pure rock in the wild. You don’t need to give them fertilizer. If you really, really, REALLY can’t help yourself, dilute a balanced cactus/succulent fertilizer by at least 1/2 strength, and water with that in fall before they begin their fall growing season. If you’re not keeping your lithops outdoors with morning sun exposure, though, this is way overkill, unnecessary, and may even kill the plant. If you’re growing them properly, you don’t need to fertilize your lithops.
#5: Pumpkin arrangements. Why is this a thing? If you want to grow your lithops long term, don’t put them in a pumpkin. It doesn’t work.
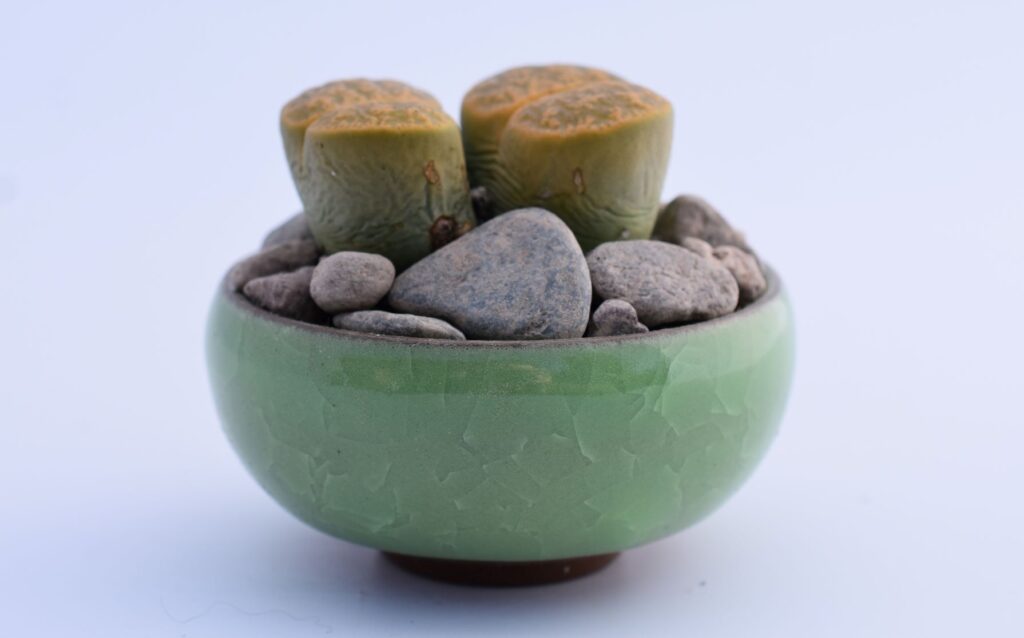
#6: Living stone or succulent arrangements that include lithops are just a slow death for the lithops. As noted above, they need cautious watering for only a handful of months out of the year, while your other pretty succulents usually need more consistent watering nearly year round. Lithops can look very cute in an arrangement, but unless it’s an arrangement of pure lithops, a mixed species arrangement is just going to result in one or more of the plants dying a sad, melty death.
Various Species and Specimens of Lithops
Below is a few of the lithops species I’ve seen at cactus and succulent shows, or at the nurseries I visit, showing you what healthy and robust lithops look like over time. Where known, the species is noted.
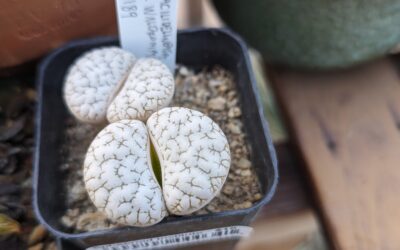
 Lithops dorotheae: typically grows in quartz and feldspar rocks, blooms yellow

Lithops…possibly bronfieldii; even the plant owner wasn’t sure. You can see the yellow blooms and slight wrinkling typical for the time of year these would be blooming.
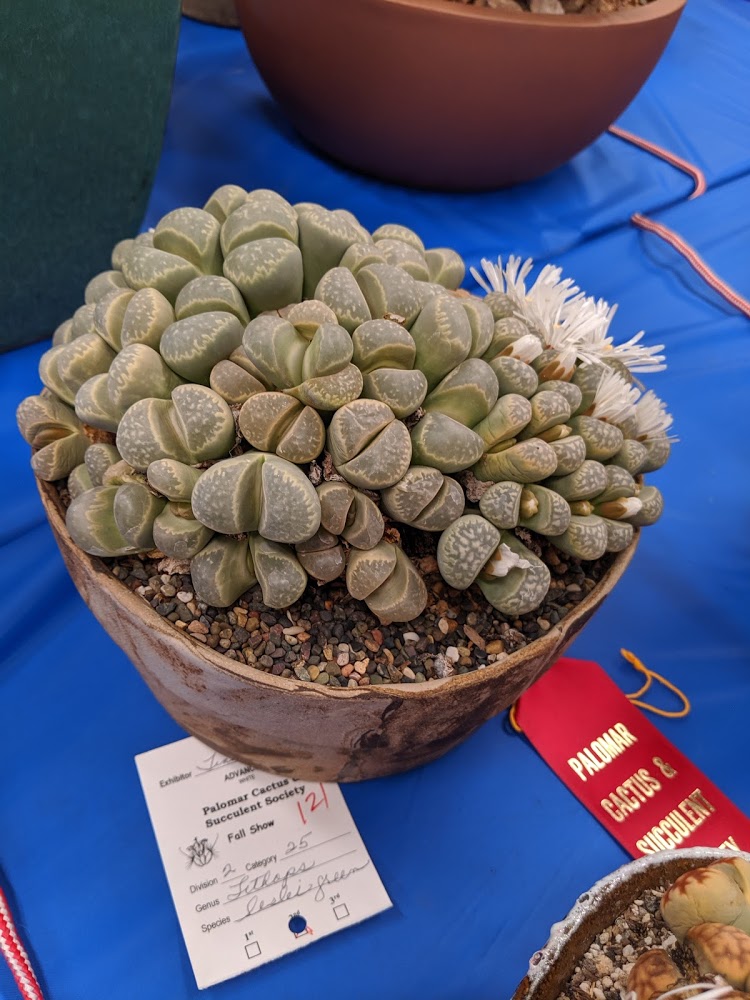
These were labeled as Lithops leslei ‘green’. The cluster was mid bloom, and you can see that the left side of the cluster is beginning to either produce blooms or split, while the right side is actively blooming. This is likely a result of positioning where the pot is being grown.
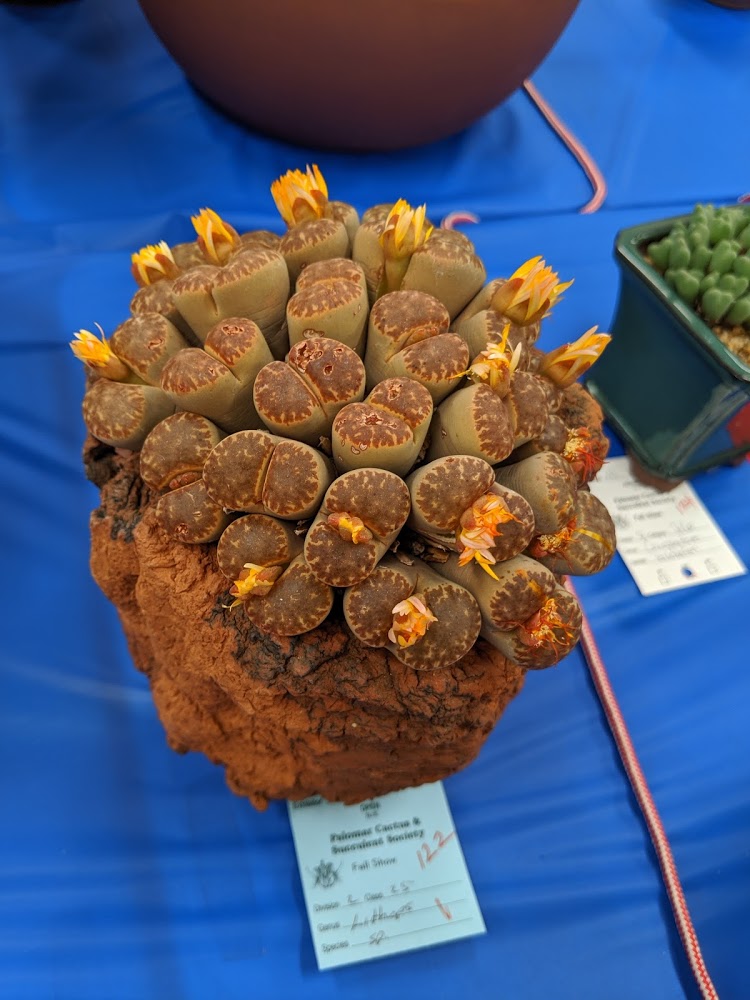
Another lithops from the fall show; these are likely a hybrid of karasmontana “red top” or something similar. You can see some light damage on the tops of the plant bodies; fortunately for this plant owner, the next growing season will replace the damaged tops with new leaf bodies, and a cactus show ribbon might be in reach.

This is a sampling of a grow table at one of my favorite nurseries with various lithops varieties potted into rocky substrate and left to grow and develop on their own. The nursery that has these acquired them along with the growing grounds a few years back, with many of these lithops specimens being quite old plants with numerous heads. Very impressive, damaged and all.
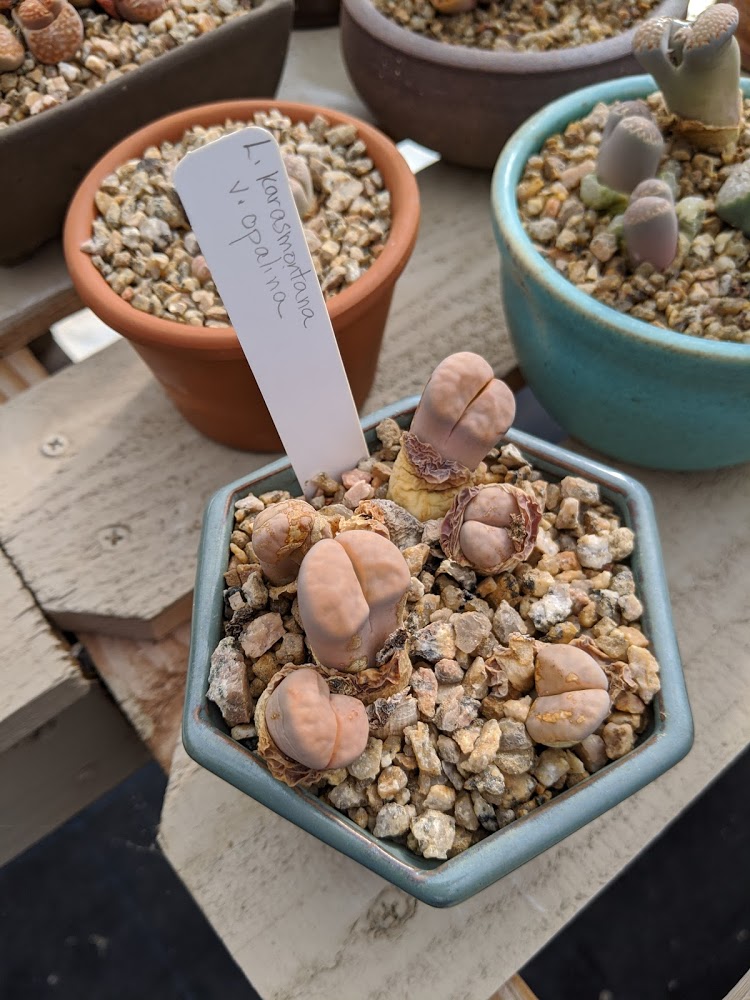
Lithops karasmontana has a number of varieties, and this is “opalina”. You can see old plant bodies on the outer edges of these plants, and when I visited the collection, it was the middle of spring, so most lithops were at their ugliest point of division and absorption of old leaf bodies. Many look quite sad, but were in good shape for the next year’s growth!
I hope this helps you understand your lithops a bit better, embrace their growth cycles, and keep your plants happy for years to come!
*I suggest not using miracle grow for your long term succulent or cactus plantings because the soil doesn’t hold up well for plants you aren’t expecting to repot for 2, 3, or more years. Because it tends to be a richer blend, it’s also pretty common for pests to hitchhike inside, and as you start to build a collection you’re proud of…it’s worth it to spend a little extra for soil that is not likely to bring pests home.
References:
Succulent Flora of Southern Africa, by Doreen Court
Mesembs of the World